Introduction and Summary
Today we will learn how to generate SSL certificates to ensure that the traffic between a website or application server you manage and your visitors is confidential / reliable and verifiable. In my previous articles, I explained how and with what configuration you would deploy the certificate you produced. In this article, I will show you how to set up the equation of less bread, more meatballs, that is, how to produce a faster and more secure SSL certificate. Normally, if you are familiar with Let’s Encrypt’s ACME protocol (as of the date of writing), it is possible to generate a 1024-4098 (if you try too hard, maybe 8196) bit certificate with RSA asymmetric key structure and use it for 90 days relatively. However, generating such a large key, using it during TLS handshake after generating it, and being compatible with the devices used by the visitors causes problems in most scenarios. For example, when 4096 bits are used instead of 2048 bits, I am faced with 0.4-0.8 seconds longer handshake times in some of my attempts. As if it’s okay for the handshake to take that long, it puts an extra load on the server. But when you generate a 384-bit ECC certificate instead of 4096-bit RSA, you get a much faster certificate and at the same time security equal to 7680-bit RSA (if it were that size).
Well, you explained it well, but where is the point of this work, I seem to hear you say. I will upset you, but there is no point in this business. The reason why it doesn’t is hidden in the background math. Briefly, I will talk about the minor differences in the production and use of both certificates, explain how and why they cause big differences, and in the last part, I will talk about something that is not written in the title as a bonus. (For the bonus you’ll have to read till the end :D)

Production process of ECC Certificate
First of all (as always), we need to install the latest updates via the console with the package manager of the Linux version we are in.
Ubuntu: sudo apt update && sudo apt upgrade -y

Fedora: sudo yum update -y

Arch Linux: sudo pacman -Syyu
After the updates are installed, we start configuring the nginx service (which is the service that allows you to receive external HTTP/HTTPS connections) on your server (Ubuntu in my case). First of all, it should be noted that because of the confusion, apache, nginx and litespeed services are different services that do the same job. I chose NGINX because it is easier to manage and has more community support.
Let’s generate the private key
First, we generate the private key with OpenSSL. The OpenSSL command we will use is ’ecparam’ (EC parameter manipulation) and to pass the configuration parameters to this command:
openssl ecparam -genkey -name secp384r1 -out privkey.pem
- The
-genkeyoption tells OpenSSL to generate an EC key. - The
-nameparameter tells OpenSSL which curve to use. - The
-outparameter tells OpenSSL to write the output to a file.
Note that OpenSSL writes its output in PEM format by default. We can check that OpenSSL is doing the right thing with the ec command that handles EC keys:
openssl ec -in privkey.pem -noout -text
-inis input file- The
-noouttells OpenSSL not to extract the key, meaninglessly printing privkey.pem to stdout. -texttells OpenSSL to write information about the key in plain text format
If all goes well and the key is generated correctly, OpenSSL will show something like the following:
read EC key
Private-Key: (384 bit)
priv:
    [secret]
pub:
    [secret]
ASN1 OID: secp384r1
NIST CURVE: P-384
This verifies that the key was created with the P-384 curve. If you ask why we don’t use P-512 instead of P-384, Let’s Encrypt doesn’t sign if the ecliptic curves are higher than 384 bits, and modern browsers like Google Chrome mark websites using 512-bit ecliptic curves as invalid. That’s the short answer.
Let’s create OpenSSL configuration for the certificate
Now we need to create an OpenSSL configuration file containing the domain-specific parameters for which we want to get the TLS certificate. In this example, we will enter the following configuration in an openssl.cnf file:
[ req ]
prompt = no
encrypt_key = no
default_md = sha512
distinguished_name = dname
req_extensions = reqext

[ dname ]
CN = example.com
emailAddress = admin@example.com

[ reqext ]
subjectAltName = DNS:example.com, DNS:www.example.com
Here is a brief description of these configuration options:
In the required [ req ] section:
prompt=notells OpenSSL to get as much configuration as possible from the config fileencrypt_key = notells OpenSSL not to encrypt the private key with a password. (Encrypted private keys are supported by Nginx, but I don’t use them.)default_md=sha512tells OpenSSL to sign the CSR with SHA512. (As far as I know, Let’s Encrypt only supports RSA with SHA256 for its signatures, but that doesn’t mean we can’t use stronger encryption in CSR.)distinguished_name=dnametells OpenSSL to look for a[ dname ]section for Distinguished Name configuration options.req_extensions=reqexttells OpenSSL to look for a[ reqext ]section in the configuration options for Subject Alternative Names (SANs) extensions that it wants to configure.
In the Distinguished Name [ dname ] section:
CN = example.comindicates the Common Name of the certificate.- Your
emailAddress = admin@example.comemail address must be prominent. Desired Extensions In the[ reqext ]section, subjectAltName provides the list of SANs for the certificate. (Chrome as of v58 requires that the Common Name be included in the list of SANs).
Let’s Encrypt v2 supports wildcard domains, so in this example you can use a single-level wildcard for non-apex hosts (*.example.com).
Let’s Create Certificate Signing Request
The final step on the client side is to generate the Certificate Signing Request using OpenSSL, then we will forward it to Let’s Encrypt for signing and retrieve the signed certificate.
The OpenSSL command required to generate a CSR is req .
openssl req -new -config openssl.cnf -key privkey.pem -out csr.pem
-newtells OpenSSL that we have created a CSR (and we do not examine an existing CSR)-configopenssl.cnf specifies the config file we created above-key privkey.pemindicates the private key we created above-out csr.pemtells OpenSSL to write the CSR to an output file (instead of stdout)
We can verify that we have generated the CSR correctly:
openssl req -in csr.pem -noout -text -verify
-verifyasks OpenSSL to verify the signature in the CSR
This should produce the following expected results in the output:
verify OK
Certificate Request:
    Data:
        Version: 1 (0x0)
        Subject: CN = example.com, emailAddress = admin@example.com
        Subject Public Key Info:
            Public Key Algorithm: id-ecPublicKey
                Public-Key: (384 bit)
                pub:
                    [gizli]
                ASN1 OID: secp384r1
                NIST CURVE: P-384
        Attributes:
        Requested Extensions:
            X509v3 Subject Alternative Name:
                DNS:example.com, DNS:www.example.com
    Signature Algorithm: ecdsa-with-SHA512
         [gizli]
Ask Let’s Encrypt to sign our certificate
The final step is to send the CSR with an ACME client to Let’s Encrypt for signing, certbot is the most common client for this job.
Command line options passed to the Certbot client depend on our setup, the person our domain is registered to, etc. varies depending. Usually we need to use the certonly command and if you used asterisks (*) you need to use one of the certbot DNS plugins.
For example, if the domain example.com is registered with Cloudflare, we can use the corresponding plugin to handle the verification, which is extremely convenient and does not require manual intervention in the process. (Configuring the Cloudflare plugin with secret token information is beyond the scope of this article.)
It’s usually recommended to make sure everything is ok with --dry-run first to make sure everything is ok.
certbot nginx certonly --dry-run --domain "example.com" --domain "www.example.com" --csr csr.pem
- Quotation marks are required around characters to avoid erroneous manipulations and are generally a good idea.
--csr csr.pemtells certbot that we already have a certificate and we need Let’s Encrypt to sign it for us.
The Certbot client will check on the command line that the requested list of domains matches the domains listed in the certificate and will use the Certbot NGINX plugin to verify that the domain is ours and let us know if there are any issues.
If nothing is wrong, it will tell you:
IMPORTANT NOTES:
 - The dry run was successful.
The actual command is just as follows:
certbot nginx certonly --domain "example.com" --domain "www.example.com" --csr csr.pem
After a (long) delay, the client will output:
- Signed certificate:
0000_cert.pem - Root and intermediate certificates:
0000_chain.pem - Certificate + intermediates:
0001_chain.pemAt this point, the CSRcsr.pemcan be deleted.
If we are curious, we can inspect the certificates returned by the client with OpenSSL using the x509 command:
openssl x509 -in 0001_chain.pem -noout -text
Unfortunately, we will discover that as described above, Let’s Encrypt signs our certificate with a SHA256 signature. (As well as being more secure, SHA512 outperforms SHA256 on modern 64-bit CPUs.) But our public key should still use ECDSA.
These files are not ordinary, so we must move and edit them in a more informative way.
On Debian Linux I like to create subdirectories for my domains by keeping my private key in /home/USER_NAME/SSL/private/example.com/privkey.pem and certificates:
/home/USER_NAME/SSL/certs/example.com/cert.pem/home/USER_NAME/SSL/certs/example.com/chain.pem/home/USER_NAME/SSL/certs/example.com/fullchain.pem
END
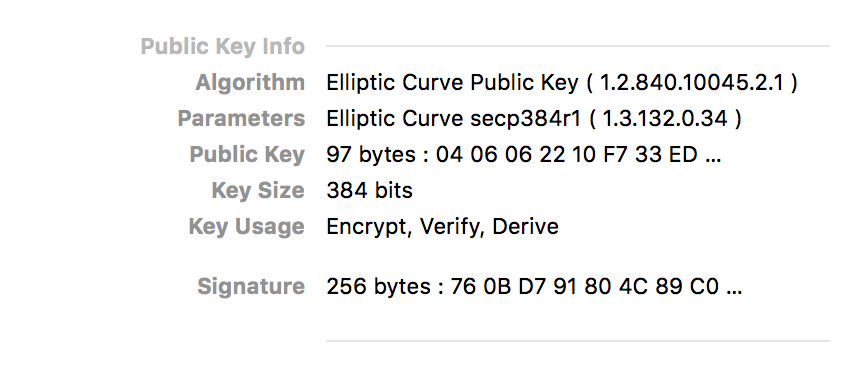
If we’ve done everything right, inspecting the certificate with a web browser like Chrome will confirm that it’s an EC certificate:
Mozilla Observatory will also give us an A+ rating!

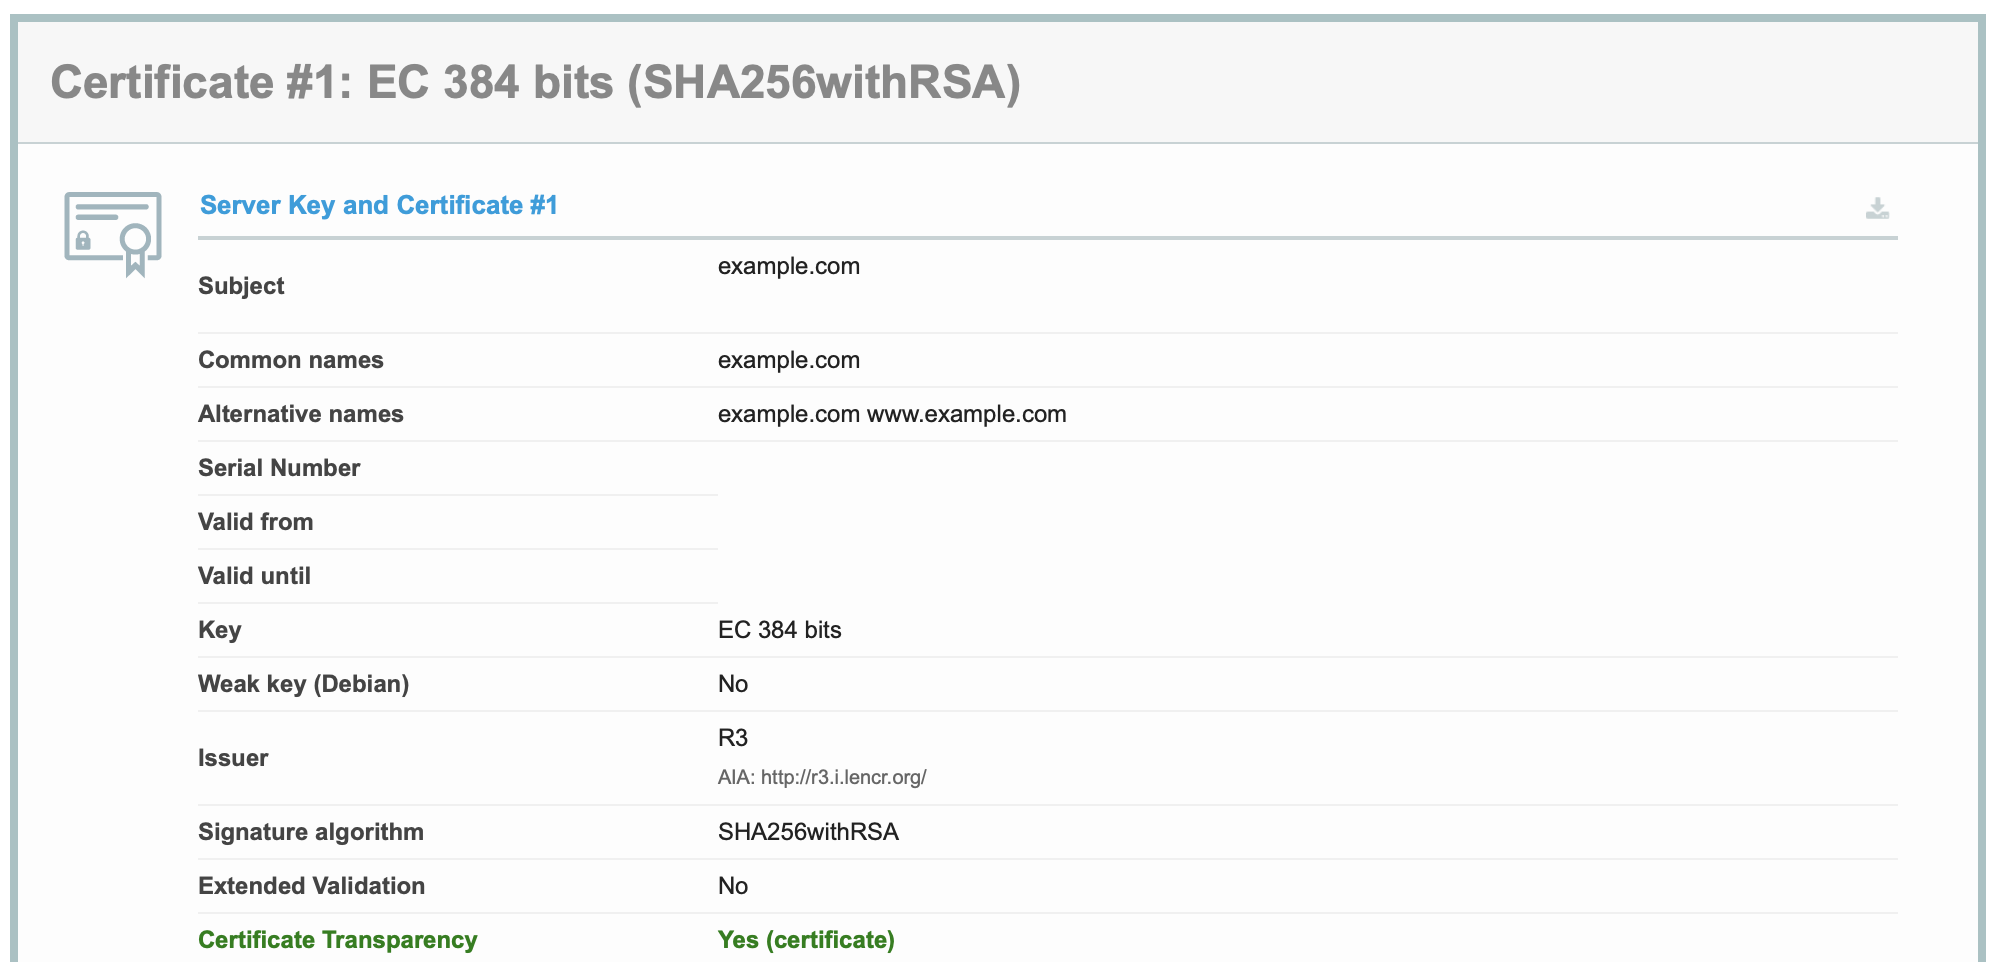
In addition, we can see that a 384-bit ECC certificate was used as a result of the SSL Labs report.
NOTE: This article has benefited from the article of Benjamin Black on the same subject.